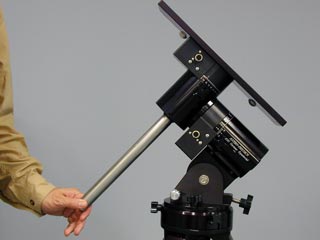
400GTO - Adjustments to Remove Worm Gear Backlash
|
|
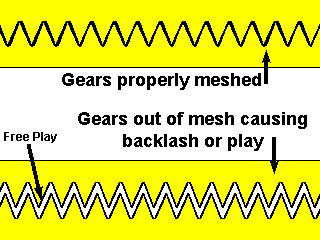
Backlash
(as
defined by Astro-Physics): Backlash is the result of a gap between the worm and the worm wheel. If movement can not be felt or seen in the eyepiece when making the following tests, the adjustments described here will not be needed. Play (as defined by Astro-Physics): The movement in an axis where there was none before. It can be felt as a back and forth movement of a gearing setup or seen as an image shift in the eyepiece where there should be none. |
|
Background Information
|
|
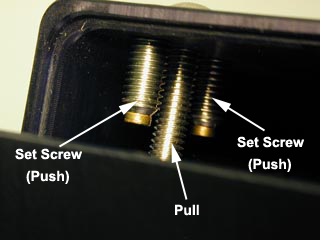 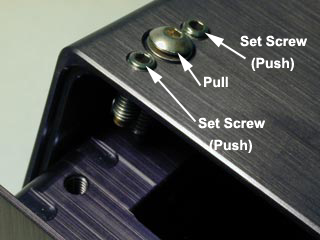 |
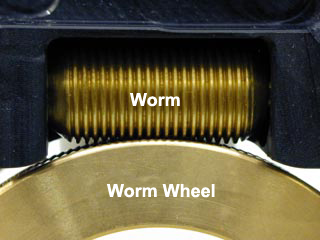
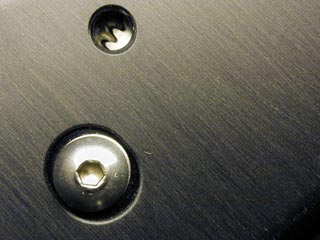
The worm gear, reduction spurs and motor are mounted in a movable module. A pair of "push" setscrews and centered single "pull" screw provide adjustment of the worm. The "push" setscrews are brass tipped and engage a mating surface. The "pull" screw is in a threaded hole, providing the pull away function. |
|
Test for Right Ascension (R.A.) backlash and corrective measures
|
|
 |
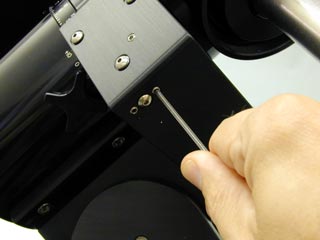
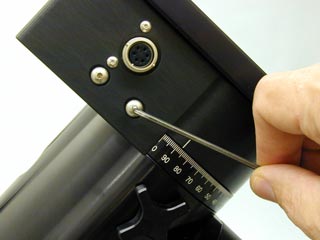
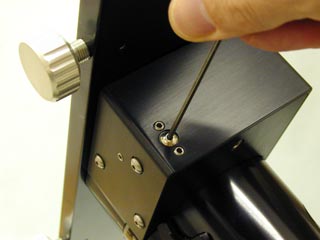
Step 1 |
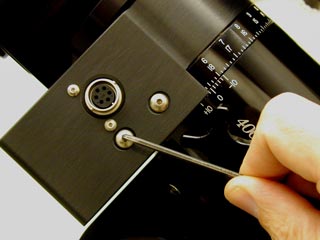 |
Note: All of
the following adjustments are made with a 3/32 inch hex key. |
 |
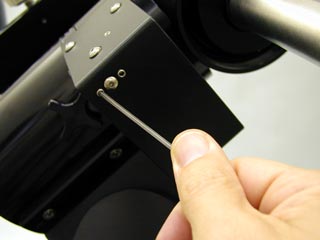
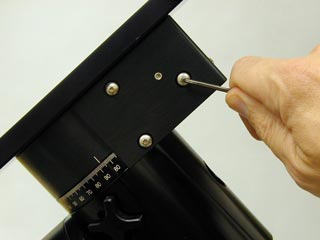
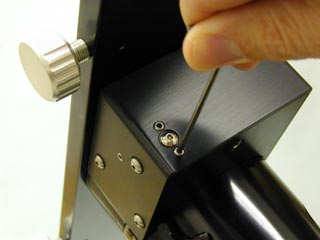
Step 3 Loosen the three buttonhead screws on the opposite side. |
 |
Step 4 Turn the center "pull" screw counter-clockwise to loosen it. Leave loose at one full turn. |
  |
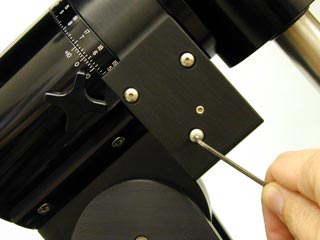
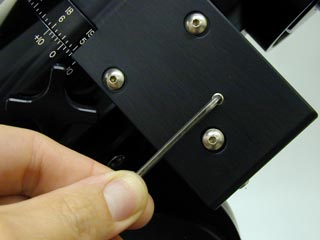
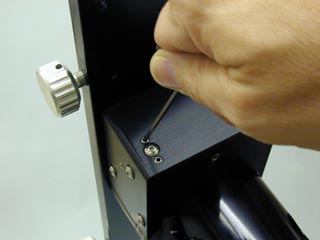
Step 5
Turn one of the two setscrews slowly clockwise while moving the counterweight
shaft back and forth. Stop immediately when play is no longer felt. |
| |
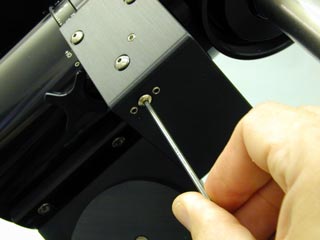
Step 6 Tighten the center
screw slowly until it stops. Grab the counterweight shaft again and
move it back and forth as you tighten the center screw. If you feel
some play develop, stop and start tightening the two outer setscrews.
Alternate between the inner and outer screws until the backlash play
goes away and all screws are tight. |
  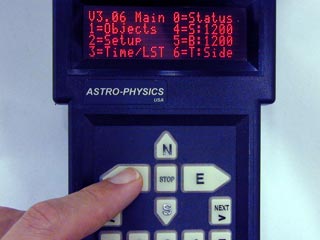 |
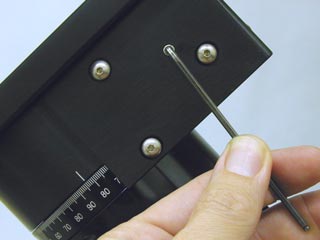
Step 7 Remove the setscrew on the worm housing. Opening this sight-hole provides a view of the internal spur gears (nonadjustable). This allows you to monitor the drive motor motions. Power up your GOTO system and allow the gears to rotate for 5 minutes at the sidereal rate. If ok, set the controller manual slew setting (by hitting button #5 on the main menu) to 1200 and make a few slews. A labored motor sound is a sign of a tight worm mesh. If the motor stalls or sounds labored please return to step 4. |
| |
Step 8 If the motor does not stall and sounds normal, close the sight-hole and re-tighten the 5 buttonhead screws. Try to apply equal pressure to each buttonhead screw. Uneven tightening can change the gear mesh adjustment. |
|
Test for Declination (Dec.) backlash and corrective measures |
|
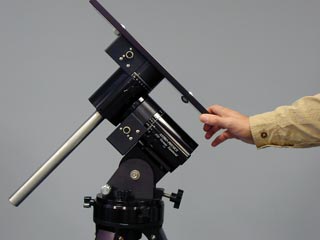 |
Step 1 Place your hand near the end of the telescope focuser or cradle plate, if the telescope is off the mount. Move the telescope or plate back and forth as if to rotate the Dec. axis. This test must be done with the assembled mount on it's pier.If play is felt or seen in the telescope eyepiece, proceed with the following adjustment. If no play is felt or seen, then you do not have an Dec. backlash problem. |
 |
Note: All of
the following adjustments are made with a 3/32 inch hex key. |
 |
Step 3 Loosen the three buttonhead screws on the opposite side. |
 |
Step 4 |
  |
Step 5
Turn one of the two setscrews slowly clockwise while moving the cradle
plate or telescope back and forth. Stop immediately when play is no
longer felt. |
| |
Step 6 Tighten the center
screw slowly until it stops. Grab the cradle plate or telescope again
and move it back and forth as you tighten the center screw. If you feel
some play develop, stop and start tightening the two outer setscrews.
Alternate between the outer and the inner screws until the backlash
play goes away and all screws are tight. |
 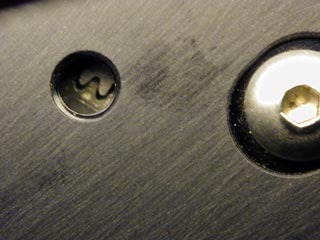 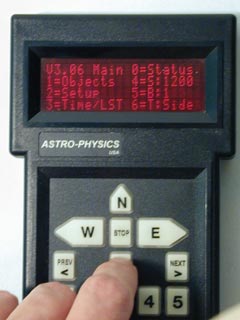 |
Step 7 Remove the setscrew on the worm housing. Opening this sight-hole provides a view of the internal spur gears (nonadjustable). This allows you to monitor the motor motions. Power up your GOTO system and allow the gears to make a full rotation at the manual speed setting of 1x (set by hitting button #5 on the main menu). If ok, set the controller manual slew setting to 1200 and make a few slews. A labored motor sound is a sign of a tight mesh. If the motor stalls or sounds labored please return to step 4. |
| |
Step 8 If the motor does not stall and sounds normal, close the sight hole and re-tighten the 5 buttonhead screws. Try to apply equal pressure to each buttonhead screw. Uneven tightening can change the gear mesh adjustment. |
Home
Back to Technical Support Index
Copyright © 2004-2019, Astro-Physics, Inc.
- All Rights Reserved
This page was last modified:
March 10, 2019
Astro-Physics, Inc.
11250 Forest Hills Road, Rockford, IL 61115, U.S.A.
Phone: 815-282-1513 Fax: 815-282-9847